How to enable debug mode (playtest) in compiled RPGMaker MV games?
Enabling debug mode in RPGMaker MV is a little different to other editions, since it's run by JavaScript. Previous methods of enabling debug mode might not work. Here's how you can enable debug mode on RPGMaker MV.
This tutorial works both for your own compiled games, and for any game that was made using RPGMaker MV.
Warning: Modifying your game may cause major errors if done incorrectly. It may also break certain license agreements or EULAs if you care about that nonsense.
Tutorial
Step 1: Go to the base directory of your game. This should be the folder with the "Game.exe" in it.
Step 2: Head down the following folders /www/ → /js/.
Step 3: Open the file rpg_objects.js in a code or text editor.
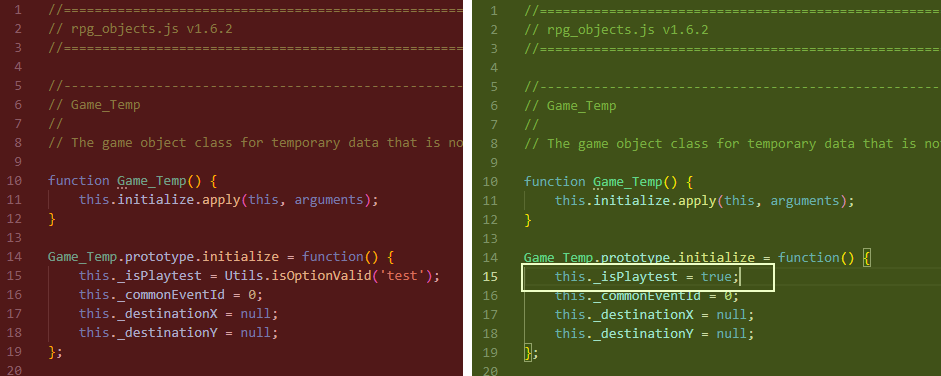
Step 4: Change the code on line 15 so that it reads this._isPlaytest = true; as shown by this image:
Step 5: Run your game and load a save (or start a new one). If you press F2, an FPS counter should appear. If you press F9, an editable menu of all switches and variables should appear.
Notes
The F9 variable menu might not work in some situations, such as open dialogue boxes or cutscenes.
The F2 display cycles between FPS, frame lag (in milliseconds), and no display.
This tutorial may be done slightly differently depending on which version of RPGMaker MV the game was published in.
This tutorial may also work for games published with RPGMaker MZ, but this has not been tested yet, so be careful.